Professional vs. DIY Paint Correction Before Ceramic Coating Brandon: What You Need to Know
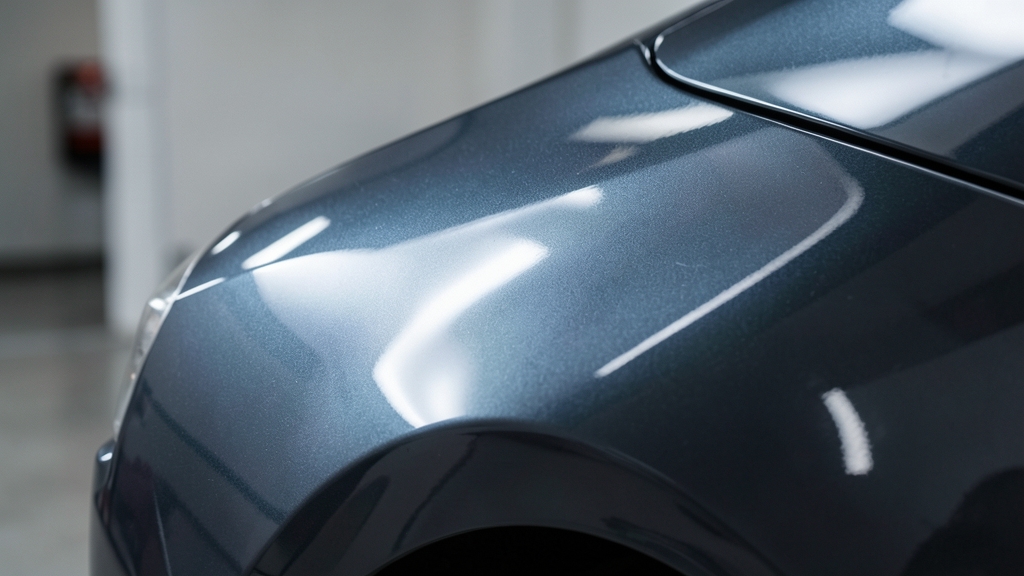
Paint correction is the foundation of a perfect ceramic coating. Without it, imperfections get locked in forever. In Brandon’s harsh sun and humidity, cutting corners here means a coating that hides flaws instead of enhancing your finish.
Why Paint Correction Matters Before Ceramic Coating
Ceramic coatings bond to the clear coat, amplifying every swirl, scratch, and oxidation mark. Skipping correction turns a $2,000 coating into a glossy mirror for existing defects.
Our climate accelerates paint damage. UV rays, pollen, and mineral deposits etch into clear coat, creating defects that DIY buffers often miss or worsen.
Professional Paint Correction: Precision Under the Brandon Sun
We use multi-stage correction with rotating and dual-action polishers, tailored compounds, and fine finishing pads. This removes 90-95% of defects without thinning clear coat beyond safe limits.
Paint depth gauges ensure we never compromise structural integrity. In Brandon’s heat, over-polishing can lead to premature clear coat failure—something we avoid with measured, methodical work.
Always correct under controlled lighting. Florida’s bright sunlight hides swirls, leading to missed defects and a subpar finish.
DIY Paint Correction: The Risks and Realities
DIY kits often include harsh compounds and incorrect pads. Without experience, you risk creating holograms, buffer trails, or burning through clear coat—especially on softer OEM paints.
Brandon’s humidity can cause compounds to dry too quickly, leading to uneven correction. Many DIYers end up with a patchwork finish that a ceramic coating will only magnify.
DIY correction on dark or metallic paints often reveals more defects than it fixes. These finishes demand professional-grade tools and techniques.
Professional vs. DIY: A Side-by-Side Comparison
The choice hinges on your goals, budget, and tolerance for risk. Professionals deliver consistent, defect-free results. DIY offers cost savings but carries high stakes for your paint’s longevity.
| Factor | Professional | DIY |
|---|---|---|
| Defect Removal Rate | 90-95% | 50-70% (varies by skill) |
| Risk of Clear Coat Damage | Minimal (measured process) | High (user error) |
| Time Investment | 4-12 hours (depending on defects) | 8-20+ hours (steep learning curve) |
| Tools & Materials | Commercial-grade polishers, compounds, pads, lighting | Consumer-grade kits, limited options |
| Climate Adaptability | Controlled environment, humidity management | Outdoor variables (heat, humidity, dust) |
| Prep for Ceramic Coating | Optimal bonding surface | Inconsistent, may require rework |
The Hidden Costs of DIY Paint Correction in Brandon
DIY mistakes often require professional intervention to fix. Correcting burned clear coat or deep holograms can exceed the cost of hiring a pro from the start.
Time is another factor. Brandon’s weather windows for outdoor work are limited. A botched DIY job can leave your car vulnerable to UV damage while you source fixes.
When DIY Paint Correction *Might* Work
For newer vehicles with light swirls and no oxidation, a careful DIY approach with a dual-action polisher and high-quality products can yield decent results.
Even then, we recommend a professional inspection afterward. Many DIYers in Valrico or Riverview bring us cars they thought were “ready” for coating—only to find hidden defects.
DIY Paint Correction Checklist
- Use a paint depth gauge to measure clear coat thickness
- Work in a shaded, dust-free area (garage or carport)
- Start with the least aggressive compound and pad
- Inspect under multiple light sources (halogen, LED, sunlight)
- Avoid correcting in direct sunlight or high humidity
How Paint Correction Extends Ceramic Coating Longevity in Brandon
A flawless surface allows the ceramic coating to bond uniformly, maximizing durability. In Brandon’s climate, this means better resistance to UV fading, water spots, and chemical etching.
Proper correction also removes embedded contaminants that can cause premature coating failure. This is especially critical for fleet vehicles or daily drivers in Tampa and Bloomingdale.
Beyond Paint Correction: Full Vehicle Prep for Ceramic Coating
True prep includes decontamination (clay bar, iron remover), paint correction, and a final wipe-down with a panel prep solution. This ensures no oils or residues interfere with coating adhesion.
For full protection, we often pair paint correction with Paint Protection Film (PPF) on high-impact areas. This hybrid approach is popular among Seffner and Riverview clients who demand the ultimate defense.
Brandon’s limestone-rich water leaves mineral deposits that etch into paint. A thorough decontamination step is non-negotiable before correction or coating.
How to Decide Between Professional or DIY Paint Correction
Use this guide to weigh your options before committing to a method.
- 1Assess Your Paint’s Condition
Run your fingers over the surface. If you feel roughness or see deep swirls, oxidation, or water spots, professional correction is likely needed.
- 2Evaluate Your Tools and Skills
If you lack a dual-action polisher, quality compounds, and proper lighting, the risk of damage is high. Renting or buying pro-grade tools may not offset the cost savings.
- 3Consider Your Vehicle’s Value
For luxury, classic, or high-value vehicles, professional correction preserves resale value. DIY errors can significantly depreciate your car’s worth.
- 4Factor in Time and Environment
Brandon’s heat and humidity complicate outdoor work. If you can’t dedicate a full weekend to a controlled process, hire a professional.
- 5Plan for Ceramic Coating
If you’re applying a ceramic coating, the prep must be flawless. Professionals ensure a surface ready for maximum bonding and longevity.
Frequently Asked Questions
Can I apply ceramic coating over minor swirl marks in Ceramic Coating Brandon?
No. Ceramic coatings amplify existing defects. Minor swirls will become glaringly visible under direct light. Always correct the paint first for a mirror-like finish.
How long does professional paint correction take before ceramic coating?
A full correction typically takes 4-12 hours, depending on the vehicle’s size and defect severity. For Brandon clients, we often spread it over two days to avoid climate-related issues.
What’s the biggest mistake DIYers make with paint correction?
Using too aggressive a compound or pad, leading to clear coat damage. Another common error is working in direct sunlight, which causes compounds to dry too quickly and leave holograms.
Does paint correction remove all scratches?
It removes light to moderate swirls and oxidation. Deep scratches that penetrate the clear coat may require wet sanding or touch-up paint before correction. We assess each case individually.
Is paint correction necessary for new cars before ceramic coating in Brandon?
Yes. Even new cars often have dealer-induced swirls, rail dust, or buffer marks. A light correction ensures the coating bonds to a pristine surface, enhancing gloss and durability.
Can I do paint correction myself and then have a pro apply the ceramic coating?
You can, but we’ll inspect the work first. If defects remain, we’ll need to re-correct the paint, adding time and cost. For seamless results, we recommend a full professional prep.